Setup a Multipass CDK Environment

I want to be able to connect to the environment using Visual Studio Code, so first we need to create a SSH key:

ssh-keygen -t rsa

We need a configuration YAML, replace <generated ssh-rsa key> with the above key, saved as cloud-init.yaml:

groups:
  - vscode
runcmd:
  - adduser ubuntu vscode
ssh_authorized_keys:
  - ssh-rsa <generated ssh-rsa key>

Assuming you’ve got Multipass installed (if not sudo snap install multipass) then:

multipass launch mantic --name ubuntu-cdk --cloud-init 

We’ll come back to Visual Studio Code later but first lets set everything up in the VM. We need to install aws-cli which I want to use with SSO (hence why we installed Mantic).

multipass shell ubuntu-cdk
sudo apt install awscli
aws configure sso

Follow the prompts and sign in to AWS as usual. Then install CDK:

sudo apt install nodejs npm
sudo npm install -g aws-cdk

Almost there, lets bootstrap1 (provisioning resources needed to make deployments) substituting the relevant values:

cdk bootstrap aws://<account>/<region> --profile <profile>

You should see a screen like this:

Create a new CDK application by creating a new folder, changing into it and initialising CDK:

cdk init app --language python
source .venv/bin/activate
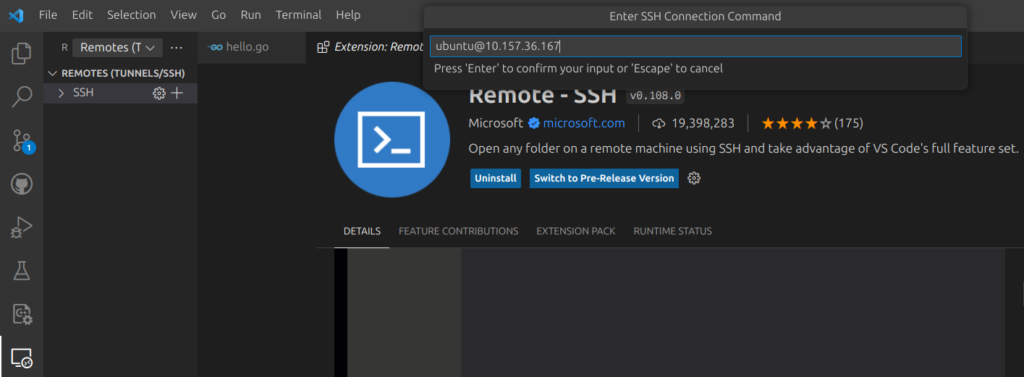
python -m pip install -r requirements.txt

And that’s about it, except for Visual Studio Code. You’ll need to install Microsoft’s Remote-SSH extension:

You can get the IP address from multipass list, then in Code add a new SSH connection using ubuntu@<ip>:

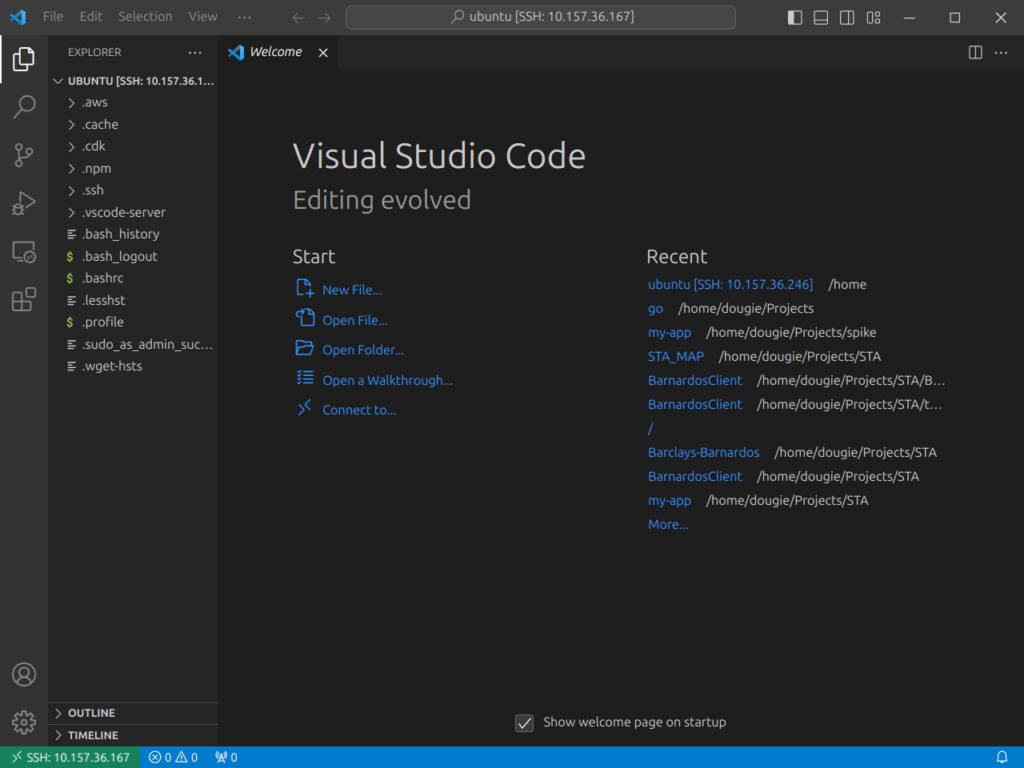
Accept the various options presented and you’re there!

VSCode
  1. Bootstrapping provisions resources in your environment such as an Amazon Simple Storage Service (Amazon S3) bucket for storing files and AWS Identity and Access Management (IAM) roles that grant permissions needed to perform deployments. These resources get provisioned in an AWS CloudFormation stack, called the bootstrap stack. It is usually named CDKToolkit. Like any AWS CloudFormation stack, it will appear in the AWS CloudFormation console of your environment once it has been deployed. ↩︎

Rainbows, decorators arguments & threads

Playing with Rainbow Hat I learned a few things about Python as a result I found out what a decorator is, the difference between args and kwargs and threads. I also learned that a lot of guides don’t understand either.

If you can’t explain it simply, you don’t understand it well enough1.

Decorators

Rainbow Hat documentation says, “use touch handlers either by passing in a function by name or using the method as a decorator”.

Learning Python (Lutz, 2013) dedicates a chapter to decorators and sums it up well:

In short, decorators provide a way to insert automatically run code at the end of function and class definition statements—at the end of a def for function decorators, and at the end of a class for class decorators2.

With similar notation to Java’s annotations:

@decorator_function def function(arguments): ...

Python is running one function through another and binding the result to the original function name.

def function(arguments):
    ...
function = decorator_function(function)

For example, Python has a built-in function that returns a static method staticmethod(function). To make example_func static, we put:

@staticmethod
def example_func(arg)
    ...

Which is rebound to:

staticmethod(example_func)(arg)

So now I know what a decorator is in Python, I used it for the buttons. What to use them for though? I figure that they should control speed of LED, sequence, or colour. That’s going to need a thread running as an event handler.

A short digression on arguments

What is a key-worded argument? Lots of documentation refers to *args and **kwargs but had no idea what it was. Arguments passed to functions are read left to right:

function('Dougie', 42)

But we can also use a key-value pair:

function(name='Dougie', age=42)

Apart from improving readability in the function call, default arguments can be assigned in the function definition:

def function(name='Dougie', age=42)

By convention these are referred to as arg and kwarg. That just leaves the *. Python lets you define functions that take any number of arguments, assembling them into a tuple. If you use key-value arguments, it assembles a dictionary.

def function(**kwargs): {...}

Now the clever(er) bit because if you do the same on the function call, Python unpacks the argument into individual arguments (*arg) or key-value pairs (**kwarg).

function(**kwargs)

Back to the main thread

The Rainbow Hat has buttons, so I want to use these to control rainbow speed. This seems suited to a thread running an event handler. The syntax for the thread library (hopefully explaining the digression) is:

thread.start_new_thread (function_name, (*args, **kwargs))

Concurrency in Python is a post in its own right. The CPython interpreter bytecode isn’t fully thread safe. There are different interpretations of what that means so I’ll use the Open University definition:

A class is considered thread-safe if its instances behave under concurrent method calls as if they were called sequentially3).

Python source code is compiled to bytecode which is run in a VM as machine code. To ensure only one thread executes bytecode at once the current thread has to hold a global lock (Global Interpreter Lock (GIL)).

This means multiple processor cores aren’t being used. In this application it doesn’t matter because the interpreter emulates concurrency by routinely switching threads.

  1. Albert Einstein []
  2. Learning Python (Lutz, 2013), pp1034 “Chapter 32: Advanced Class Topics” []
  3. M362 Developing concurrent distributed systems (THE OU, 2008 []

Python List Comprehension

I’ve been spending time with Python recently and am beginning to really like some of the language’s features. List comprehension creates a list by evaluating an expression on each item in each list, from left to right. It combines an expression and a loop:

>>> [ord(letter) for letter in 'example']
[101, 120, 97, 109, 112, 108, 101]

Apply a condition :

>>> [ord(letter) for letter in 'example' if ord(letter) < 112]
[101, 97, 109, 108, 101]

It’s useful for combining lists:

>>> [(letter, number) for letter in 'ab' for number in '12']
[('a', '1'), ('a', '2'), ('b', '1'), ('b', '2')]

Pimoroni’s Rainbow Hat introduction has an example to cycle colours on the LED rainbow:

for i in range(101):
    h = i / 100.0
    r, g, b = [int(c * 255) for c in colorsys.hsv_to_rgb(h, 1.0, 1.0)]
    rh.rainbow.set_all(r, g, b)
    rh.rainbow.show()

This is a little hard to follow but we’ll break it down. Hue, Saturation and Value (HSV) represents colour using three values between 0.0 and 1.0 creating a colour “wheel” that is easy to cycle on the LED. Unfortunately, the LED combines red, green and blue. The Colorsys library can convert between the two.

  • The expression is int(c*255)
  • The loop is for c in colorsys.hsv_to_rgb(h, 1.0, 1.0)

The h=i/100 is giving a range of values from 0.0 to 1.0 in 0.01 steps (we could use a list comprehension too [i/100 for i in range(101)]).

So, let’s look at a snapshot, where h=1.3:

>>> colorsys.hsv_to_rgb(0.13,1.0,1.0)
(1.0, 0.78, 0.0)

Which the list comprehension converts to:

>>> [int(c*255) for c in colorsys.hsv_to_rgb(0.13, 1.0, 1.0)]
[255, 198, 0]

Giving us the RGB value needed.